Isn’t that an awesome headline?
It struck me while I was making sandige while the sun shone. :P Ok pardon my lameness, I’m very happy because we just made sandige. It’s something that always fills me with glee!
When I was a school-going child, summer holidays meant it was time to wake up early and put sandige. (I say “put” sandige and not “make” sandige because in Kannada, it is sandige “haakodu.” Not sandige “maadodu.”)
My paati would do the initial setting up (which is actually “making” the sandige with all the ingredients), and then my mom, sister, my friends and I would go to the sunniest terrace and put sandige. It happened just once a year and the novelty of it excited all of us.
First of all, let me tell you what sandige is.
Sandige
(san-di-gay | sʌn – dɪ – geɪ)noun
plural: sandige
- a condiment usually made from rice or puffed rice (aralu puri) or tapioca pearls/sabo (sabakki/sabudana). To be fried and consumed, usually as an accompaniment with rice, rasam and sambar. Tastes heavenly with curd rice too.
And here is how you pronounce it.
I’m going to give you a tutorial to make aralu sandige. It is just one of the few forms of sandige, perhaps the tastiest, only if made right. Many people make it, but it usually becomes too hard / too spicy / too horrible. So here’s the right way of going about it. My mom’s recipe can’t go wrong, unless you really have no clue able what you’re doing!
How to make Aralu Sandige
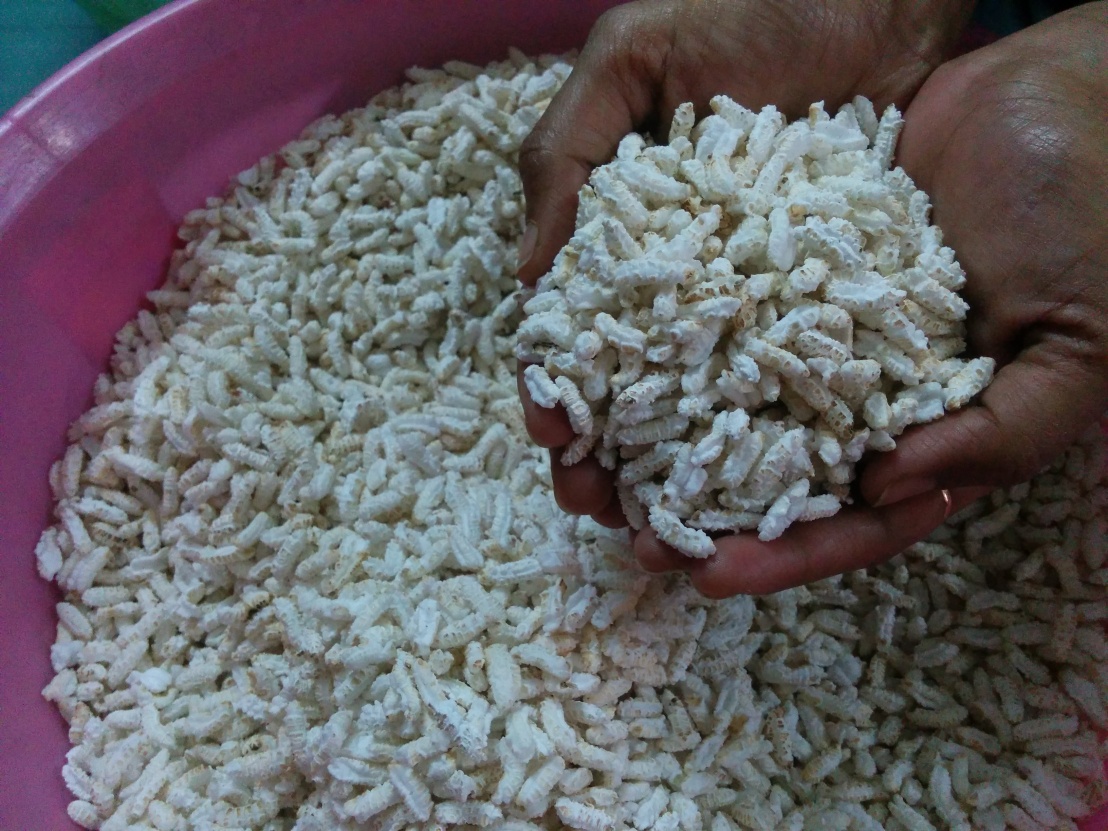
Step 1: Buy aralu puri
This is aralu puri. Around 10 litres of aralu puri is good to make your sandige last a few months (depending on how often you eat it). Don’t eat it too often because you have to fry it in oil to consume it.
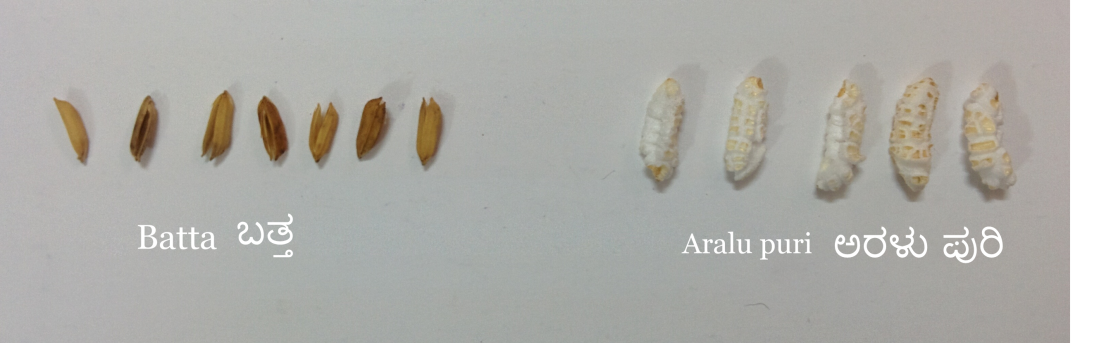
Step 2: Separate the batta from the aralu puri
Aralu puri usually has a lot of batta in it. Batta is basically unpuffed rice. It is brown, sharp and inedible. It takes around 4-5 hours for three people to separate batta from puri (10 litres), one by one. Try to buy aralu puri that has already been cleaned to save you some back-breaking labour.
Step 3: Gather all ingredients
I’ve listed the ingredients you require for 10 litres.
- 10 litres cleaned aralu puri
- 100 g green chilly
- 1 handful of kothamri (coriander)
- 100 g overnight soaked and cooked sabakki (sabudana / sago) (This is used mainly to bind the loose ingredients together)
- Salt to taste
- One big lemon (Optional)
You’ll need two big tubs/vessels. One to soak the aralu puri in water and one to mix all ingredients.
Step 4: Dip aralu puri in water
In this step, you are cleaning the puri and also soaking it. You have to take it out of the water immediately (within five seconds) so that it doesn’t get too wet. So don’t put an entire 10 litre pile into a big vessel of water. The puri will get shrink and get ruined. Do it bit by bit.
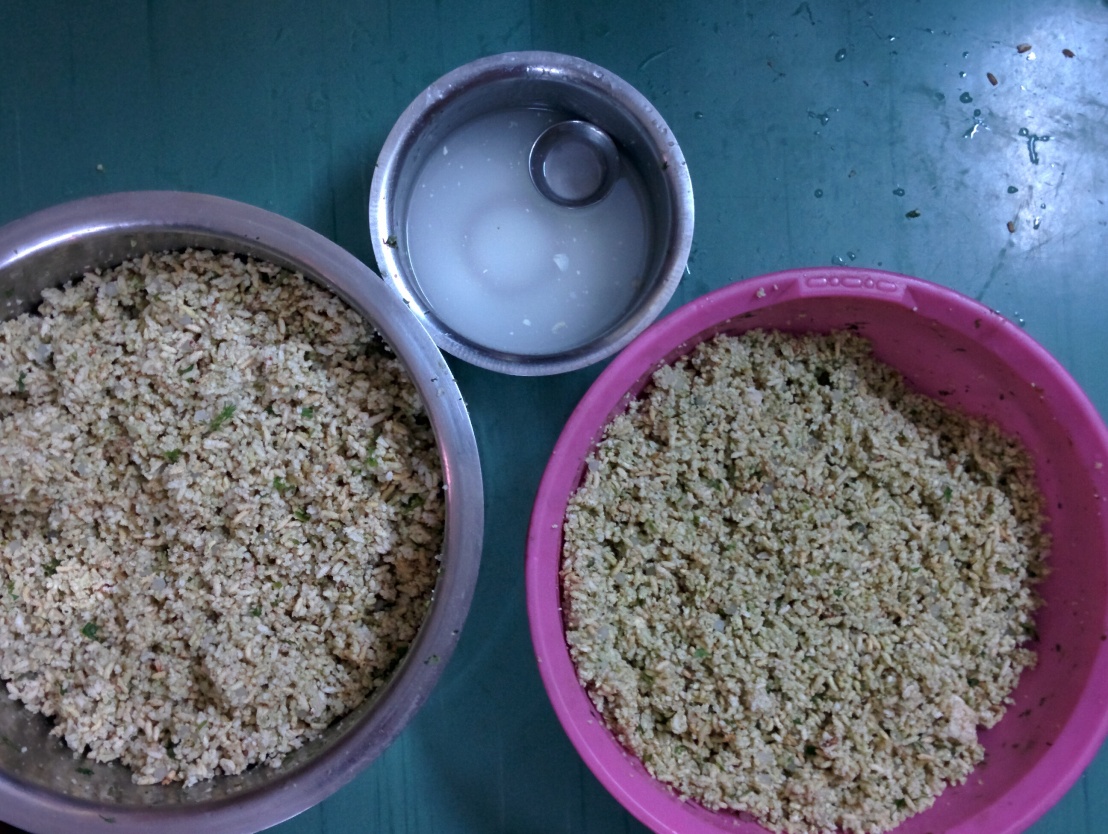
Step 5: To the wet aralu puri, add all other ingredients
- Chop chillies and coriander finely. You could even grind them.
- The sabakki has to be soaked the previous night and boiled in the morning, so that it is soft and slightly sticky. It is an ingredient that holds the otherwise loose aralu puri together.
- One option is to squeeze a lemon into the mix so that it doesn’t get too sticky.
- Taste the mix and see if it suits your taste buds. It usually tastes E.P.I.C.
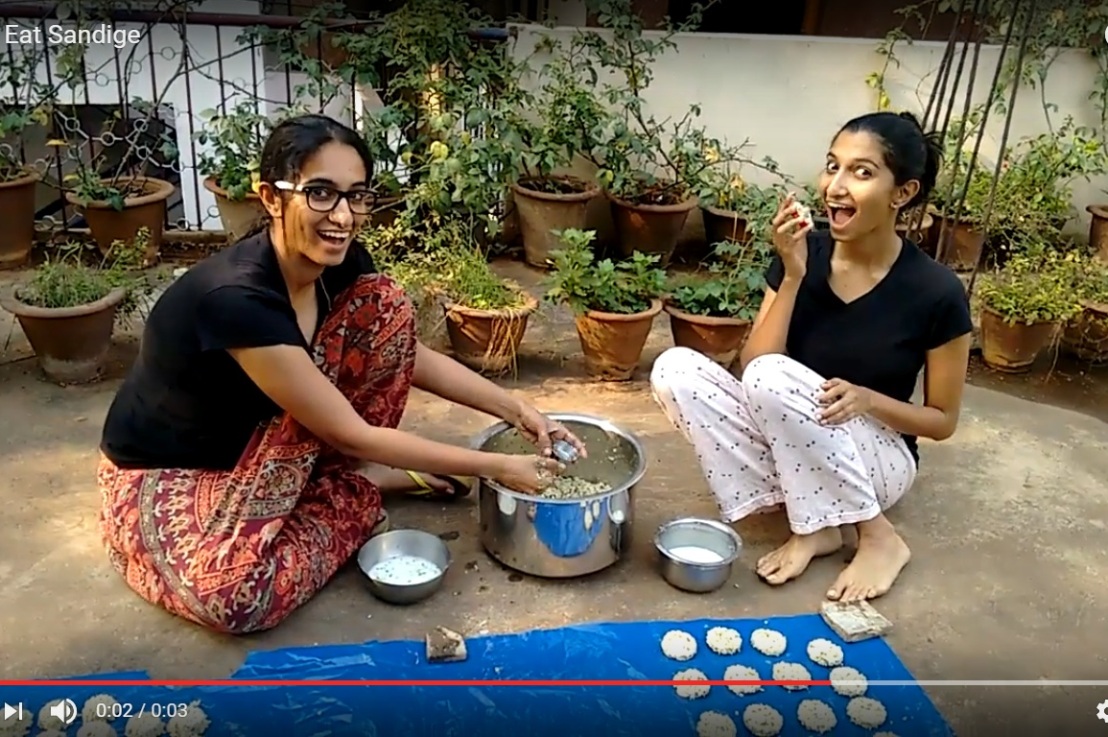
Step 6: Gather everything you need to put sandige on the terrace
You’ll need
- The sandige mix
- A circular mould to put the sandige with. The lid of a pickle jar will do. Has to be around the size of your palm and flattish
- A bowl of buttermilk, to dip your hand and the mould in
- Plastic sheets to put the sandige on. Even a fresh panchey / veshti / dhoti will work.
- Some rocks to use as paperweight to hold the sheets down.
- A sunny terrace
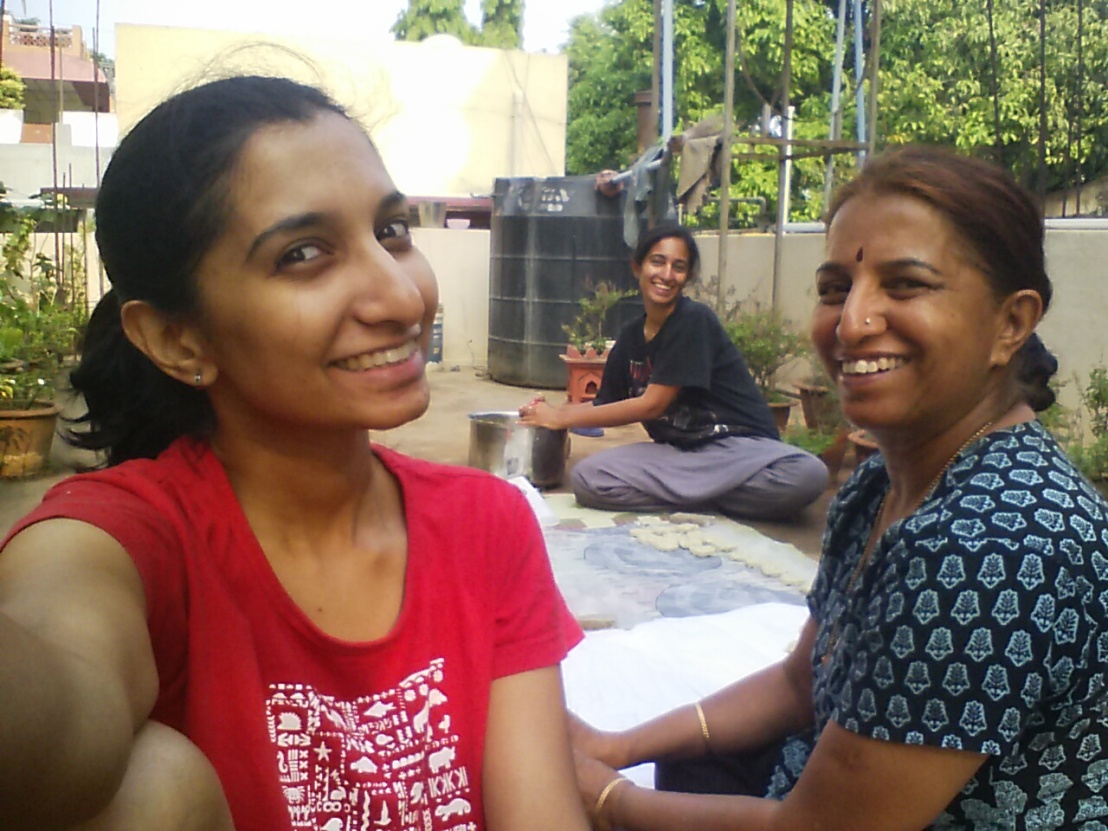
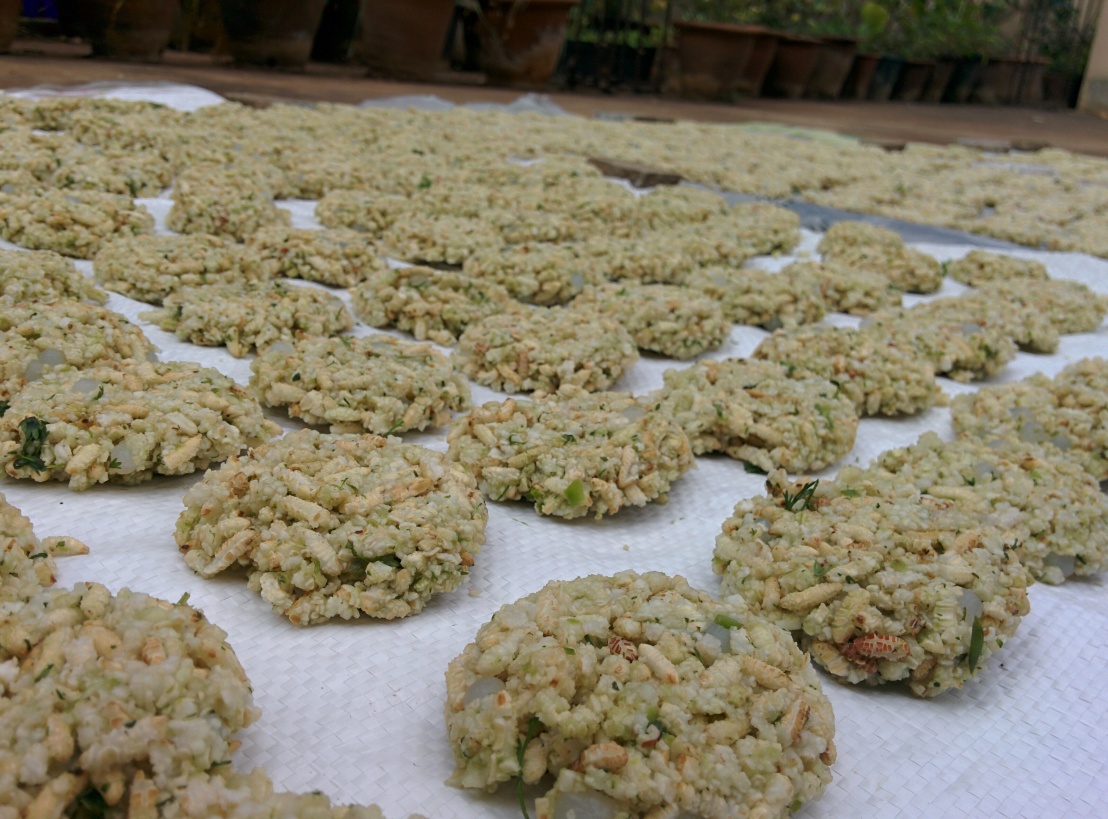
Step 7: Start putting the sandige
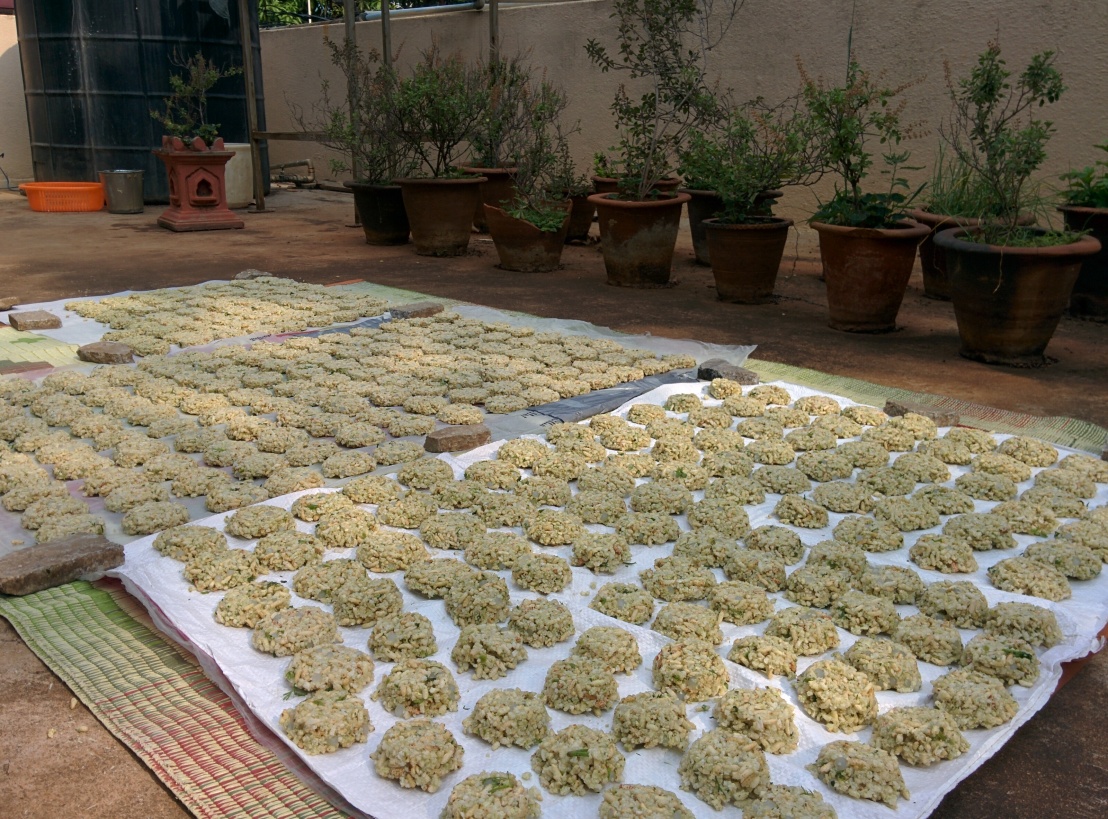
This is the most fun part of putting sandige. Pick up some aralu puri that you mixed, put it in the mould so that it is flat and tap it on the sheet. When it falls down in that exact same shape and stays together, it is just so gratifying! Check this.
Step 8: Remember to eat some as you’re making it
I think sandige tastes best best when you’re putting it. It’s better than when you fry it and eat it. It is also healthier! I love it like this.
Step 9: Leave it on the terrace to dry
Once you’re done putting sandige in neat lines, leave it out for the rest of the day to dry. The top layer will dry first, while the underside will be wet. Once the top portion is sufficiently dry (might take a whole day), turn it upside down and let the other side dry.
Put it out on the terrace everyday for around a week to dry it thoroughly. Bring it back inside every evening. You don’t want to leave it out all night and let all sorts of insects eat it.
It must dry completely before you “store it in a cool dry place.” If it is wet, it might catch fungus and rot. So check it properly after a week before you store it.
Step 10: Fry it, eat it and enjoy it
Next time you’re eating rasam rice, sambar rice, curd rice or bisibelebath, bring out the sandige, fry it and eat it.
To fry it you have to dip it in boiling oil for hardly ten seconds. the hard dried up sandige fluffs up when you fry it. It becomes gorgeously crunchy! It goes amazingly well with sambar rice or bisibelebath.
Oh I’m craving for some right now.
Let me go make me some sandige.
Meanwhile, you go make some sandige while the sun shines!